1. Create a mailbox
First you need to create a mailbox in your GoDaddy store account. On the home page of your account select your email clutch.

Click Set Up in the FREE EMAIL PLANS frame.

You will see a domain, for which a mailbox will be created.

After you clicked Set Up, a new item will appear with the newly created mailbox store account on the same email tab, on the popup.

Next you need to press Launch to set the mailbox. On the next page you have to find the add button.

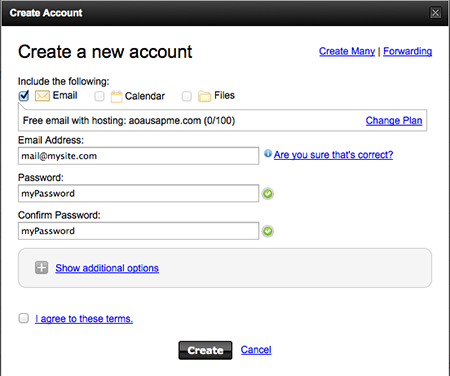
A popup opens and you select a mailbox address and password. For example: email: mail@mysite.com and the password: myPassword.

On this stage the process of creating an email is over. Next you have to know server domain mail. To make this, go on the main GoDaddy account page and go to the server tab and click Launch right in front of your server. In the next window find the Server Name - this is the mail server domain that you want - dedrelay.secureserver.net.

2. Postfix install and configuration
Through ssh go to the server and as root user type:
sudo apt-get install postfix
After installation, it is needed to create file for authentication by post server
sudo touch /etc/postfix/sasl_passwd
In this file type in the following line substituting your data:
dedrelay.secureserver.net mail@mysite.com:myPassword
Then perform such commands:
cd /etc/postfix/
sudo chown 600 sasl_passwd
sudo postmap sasl_passwd
Open the file /etc/postfix/main.cf with your favorite editor and drive configuration to this form:
relayhost=[dedrelay.secureserver.net]
smtp_sasl_auth_enable = yes
smtp_sasl_password_maps = hash:/etc/postfix/sasl_passwd
smtp_sasl_security_options = noanonymous
smtp_sasl_type = cyrus
mynetworks = 192.168.1.0/24, 127.0.0.0/8
The value of Relayhost parameter must be written in brackets. If you want to specify the port you can use such format
[dedrelay.secureserver.net]:3535
Reboot the server:
sudo /etc/init.d/postfix restart
and enjoy the results.
See also: An Easy Way to Get a List of Your Tweets with Handlebars!

